Form templates are built once and reused on every job that needs them: Certificates of Compliance, SWMS, safety inductions, service checklists, handover forms, whatever your trade runs on. Build the form so it reads like the paper version, save it to your form library, and it's there on every job.
Two ways to start
Every new form starts one of two ways.
- Start from scratch — a blank form with two example short text fields on it. Rename them, delete them, and build up from there.
- Use a template — a ready-made form you copy into your library and change to suit. Faster when the form is a standard one.
A template is a starting point, not a link
Using a template copies it into your library. Anything you change afterwards is yours alone; the original template stays as it was, and your form keeps working even if the template list changes later.
Picking a template
Go to Settings → Forms, click New Form, then Use a template. Templates are grouped into categories down the left — Safety & Compliance, Insurance, Inspection, Client Intake, Handover, Feedback and General — and the search box matches on name and description. Each card shows how many fields the form has. Use Template opens a full copy in the builder, ready to customise.
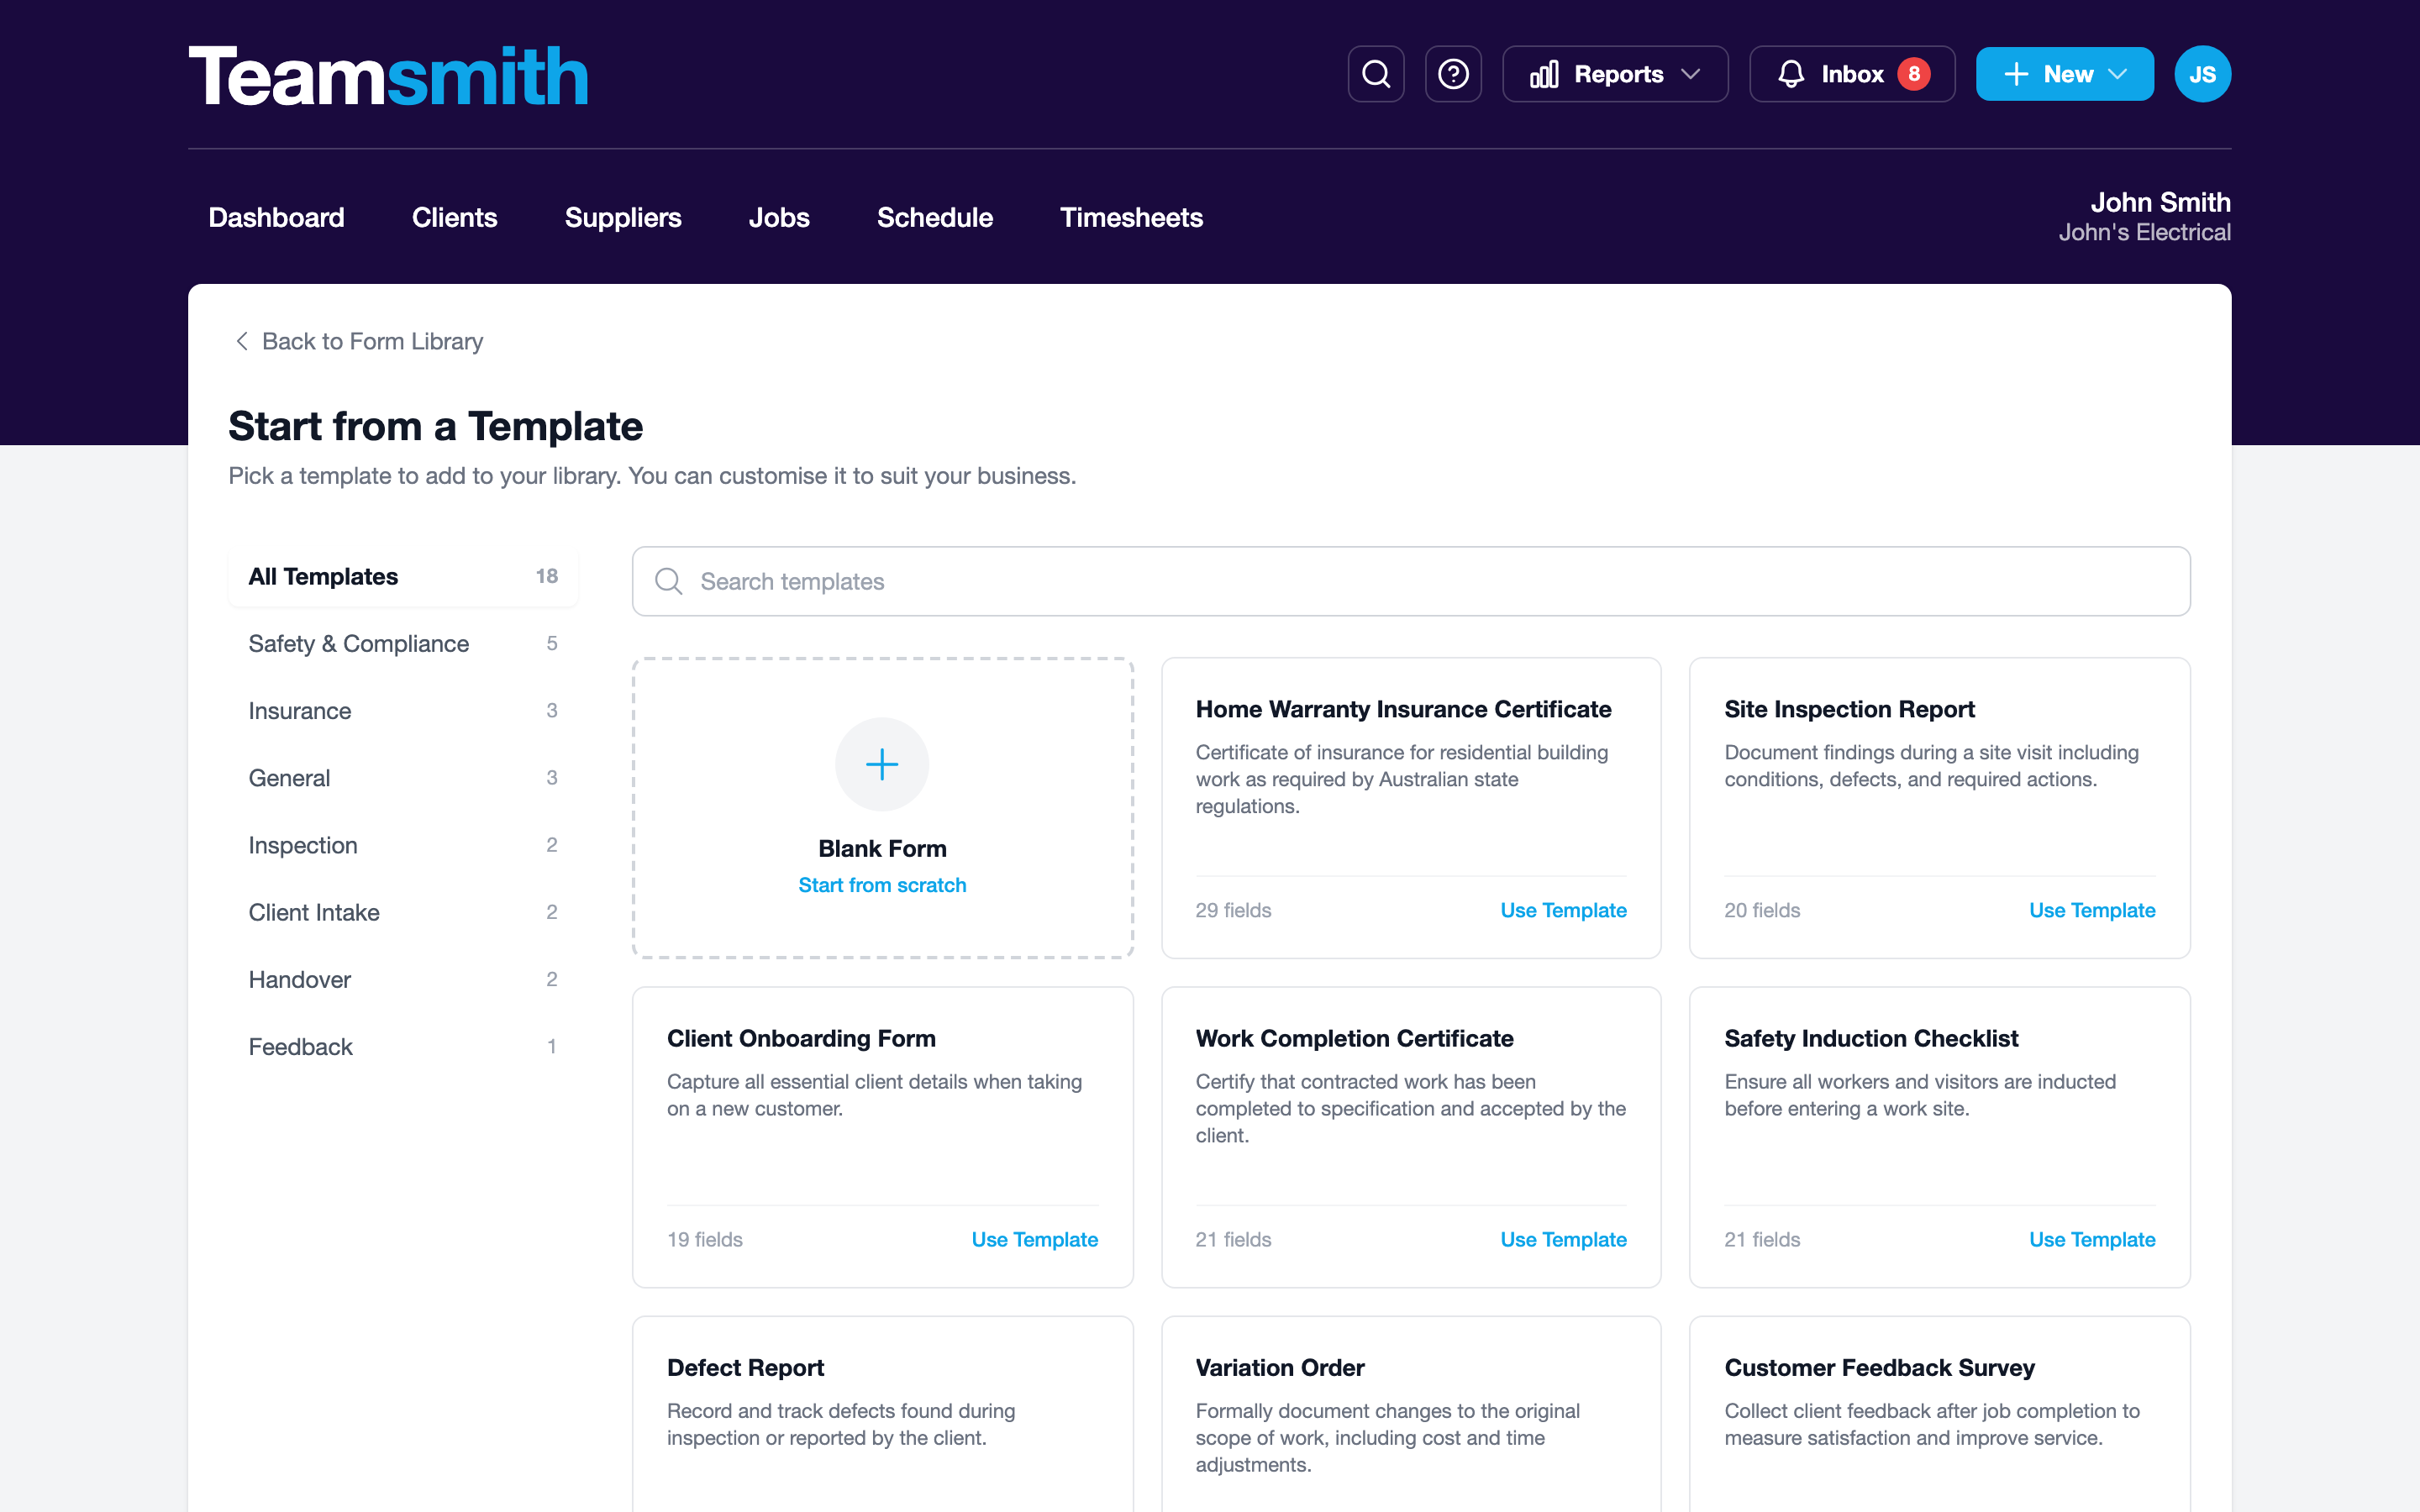
Tap your avatar, then Settings → Forms, then +. Choose Blank Form to start from scratch, or pick a template — the same categories and search as the web, sized for the phone. Tap Use Template and the copy opens in the builder.

Customising the form
The builder works the same way on both platforms: a form title, a description, and a list of fields you add, label, reorder and configure.
The form itself is on the left and the list of elements is on the right. Click an element to add it to the bottom of the form, then type straight onto the form to set the title, the description, a field's label, a section's description or the choices on a multiple choice question — no dialog needed for the everyday stuff.
Hover over a field and three buttons appear next to its label:
- The up and down arrows move the field through the form.
- The pencil opens Field Settings, where the rest of a field's options live — required, placeholder text, number and date rules, upload limits and conditional visibility. Form Elements covers what each one does.
Fields lay themselves out automatically: short text, number, date and dropdown fields take half the width and pair up side by side, everything else runs full width.
Preview shows the form the way the client or the auditor sees it, with your logo and brand colours from Settings → Branding. Worth a look before you save.

Edit the title and description at the top, then tap Add element and pick the type you want. Tap any field to open its settings, where you can rename it, mark it required, set placeholder text, edit the choices, switch it between Half and Full width, move it up or down, or delete it.
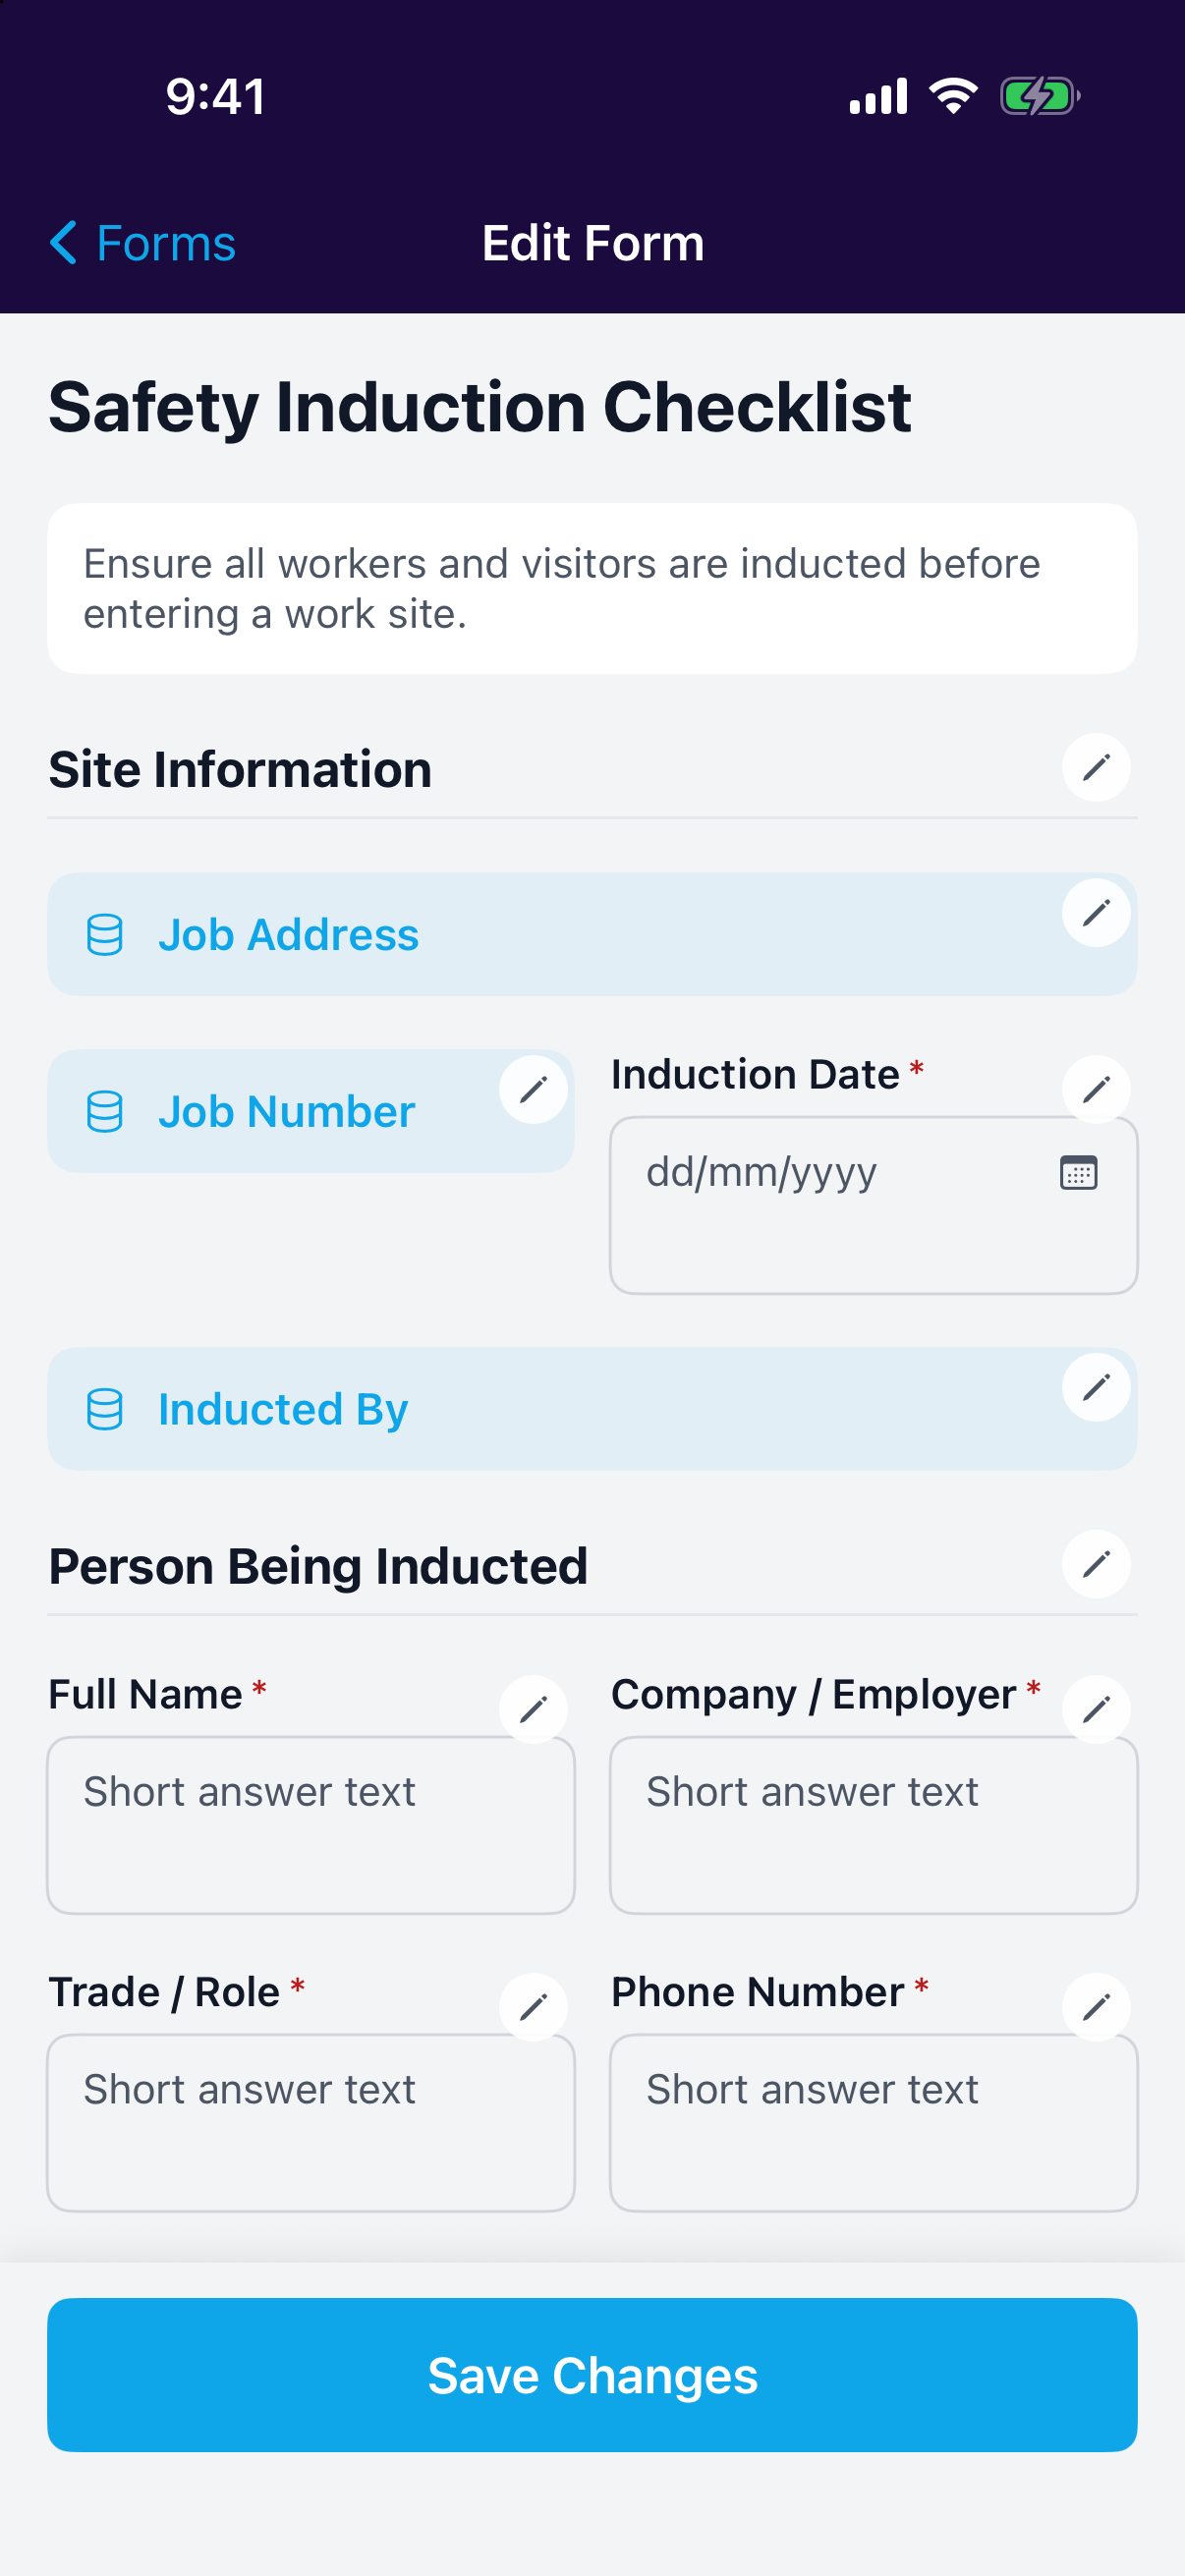
Sections keep long forms readable
Drop a Section Break in wherever the paper form changes topic — Site Information, Person Being Inducted, Sign Off. Each one gets a heading and an optional line of instructions, and it's the difference between a form that gets filled in properly and one that gets skimmed.
Saving to your library
Save to Library (or Save Changes on a form you've already saved) puts the form in Settings → Forms, where it's available to attach to any job. From there you can open it to edit it again, or delete it.
Editing a form later only changes the form. Anything already filled in on a job keeps the answers and the layout it was completed with, so nothing already signed off changes underneath you.
Next: Form Elements covers every element you can add and the settings behind each one, and Filling In Forms on Site covers using the form once it's built.