A job is the hub of the work you do. Quotes, appointments, timesheets, forms, invoices and work orders all hang off it. Start the job first, then build out from there.
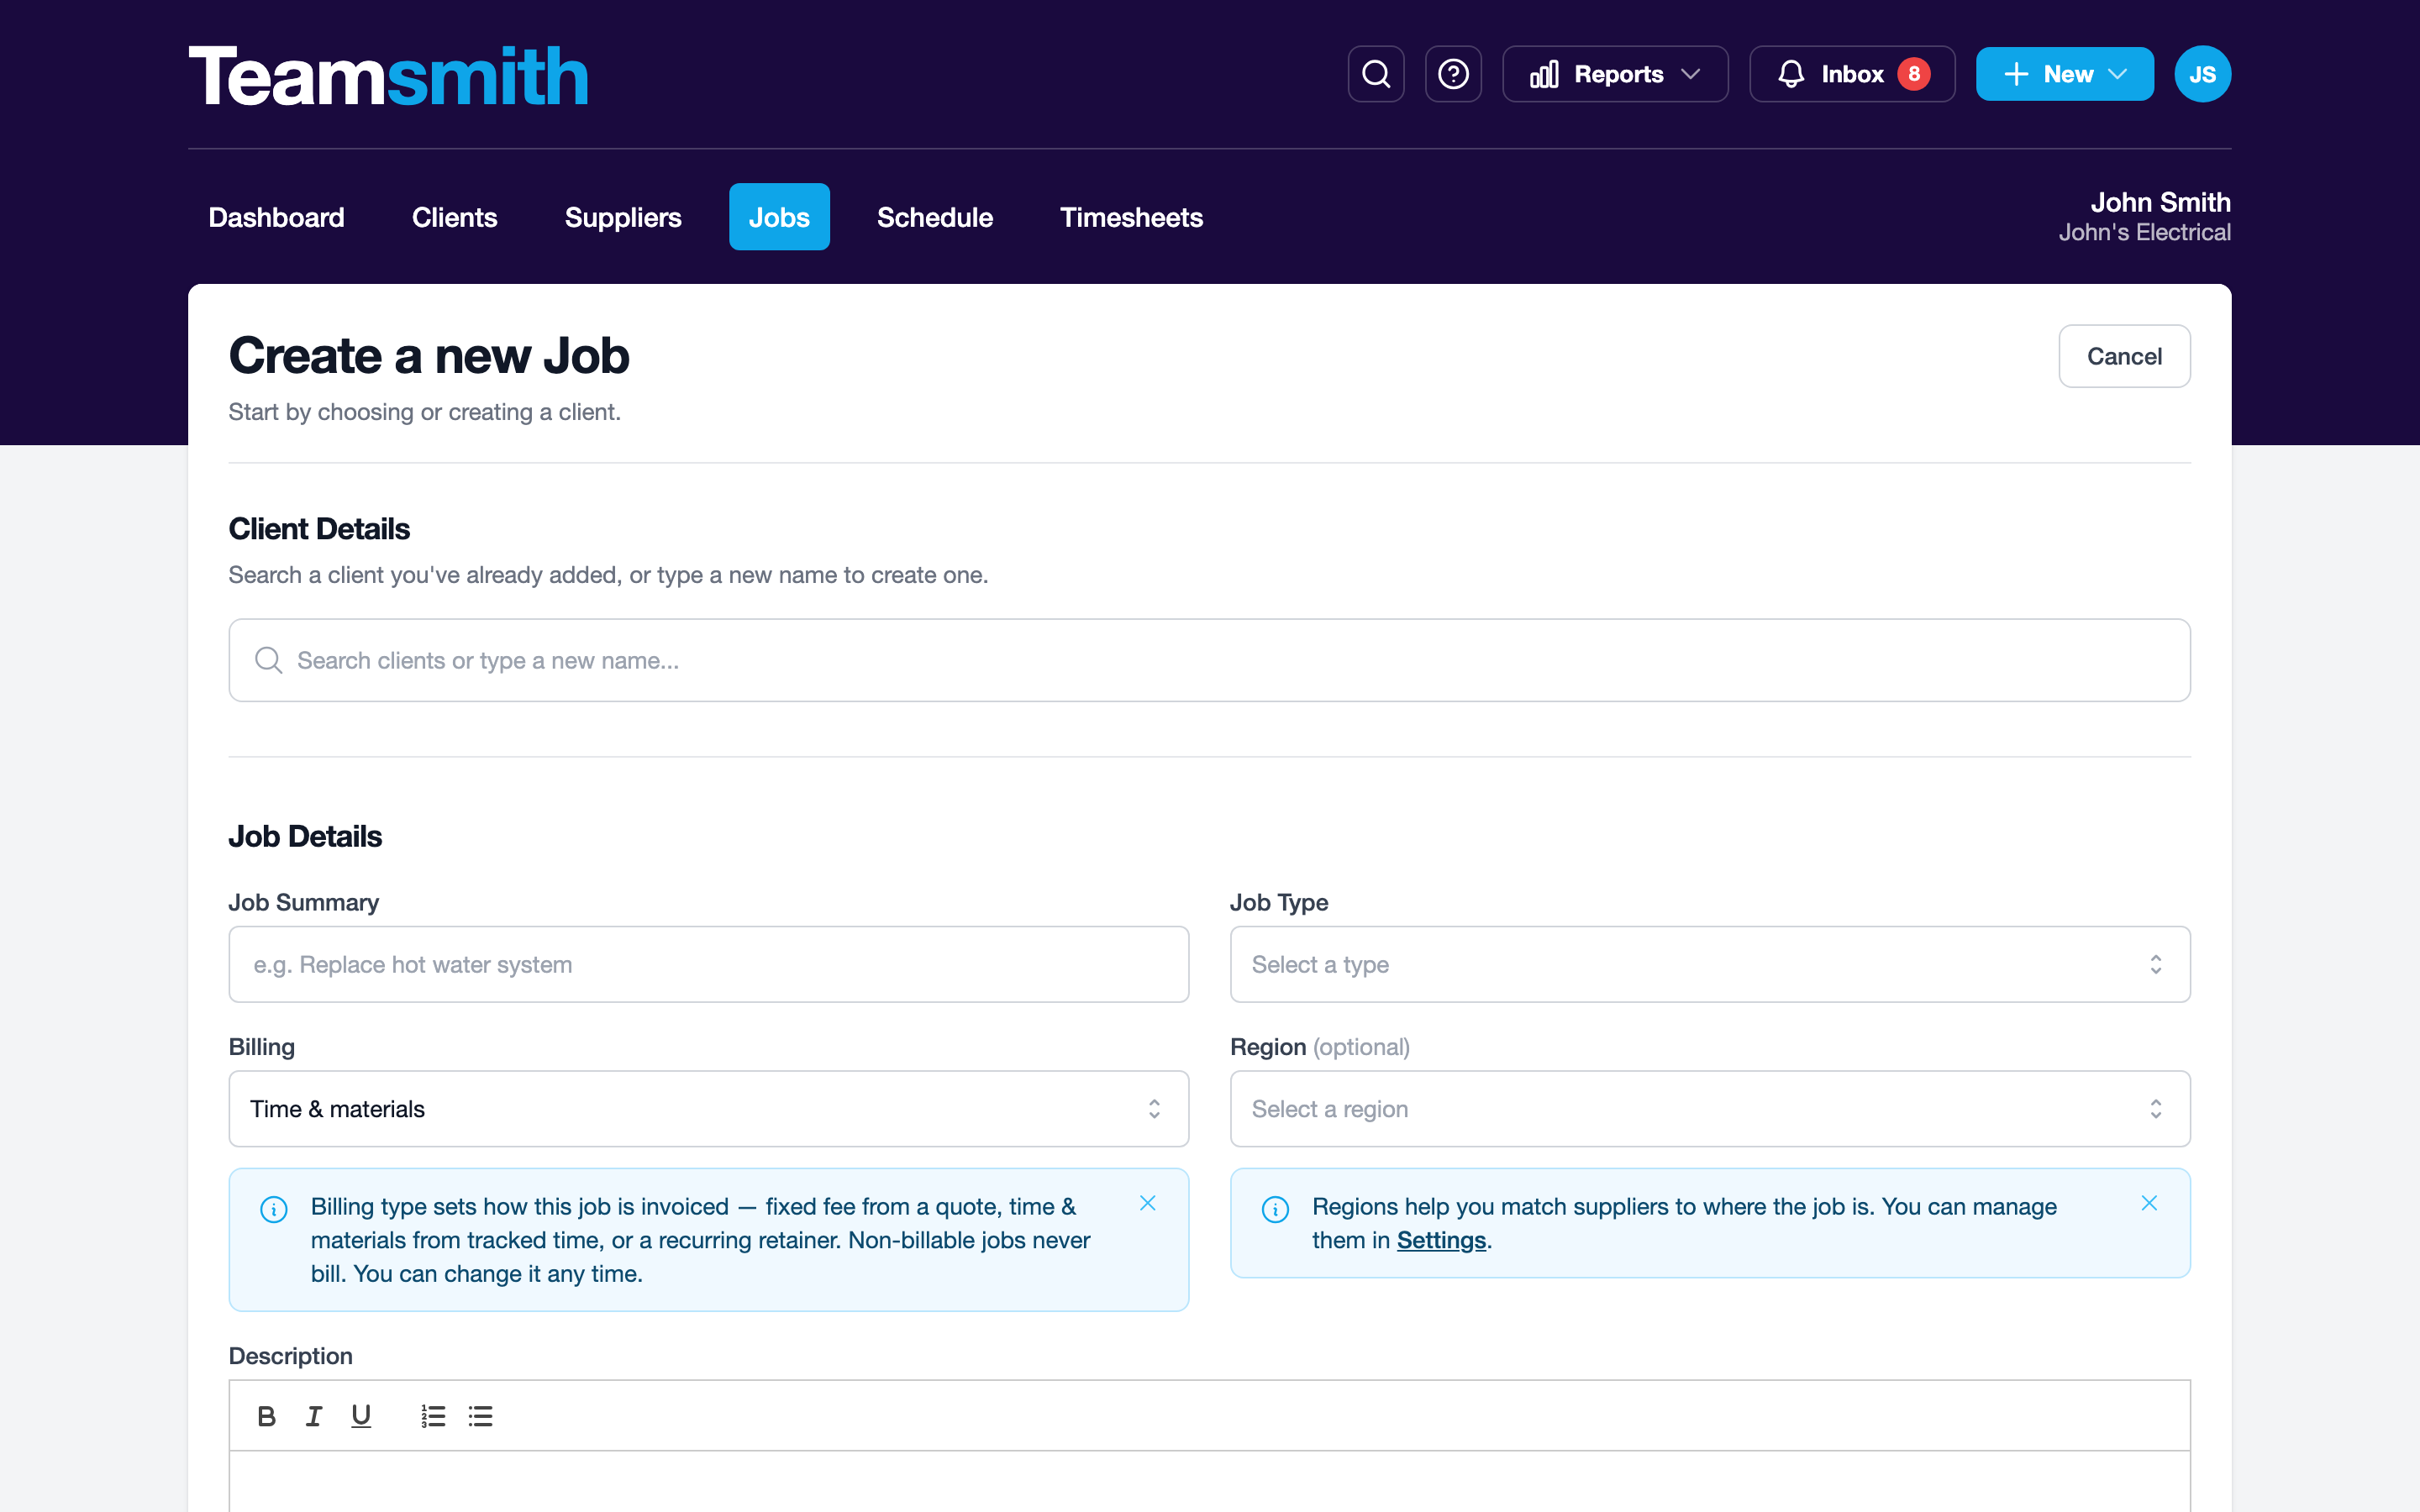
Every job is created against a client, so pick the client before anything else. Then fill in the job details: a summary, a job type, a billing type and, optionally, a region and the team on the job.
Step 1: Pick or create the client
Start typing in the client search. Matching clients show with their contact and address, and clients with more than one site show a site count.
If the client isn't there yet, you don't have to stop and go set them up first. Keep typing the name and choose the Create "…" option at the bottom of the results; you get a short form for company name, primary contact and address, and you land straight back on the job with the new client already selected. Everything you enter is saved as a proper client record, so it's there next time too.
Quick-add is a real client
A client created this way is identical to one added from the Clients tab; see Adding clients. Fill in what you know now; you can add the rest later.
Once a client is chosen, Teamsmith fills in the rest from their record:
- Contact: if the client has several contacts, pick which one this job is about. If they have none on file, add a name (and optionally phone and email) inline.
- Job site: if the client has several sites, pick the one the work is at. If they have no address on file, type one in and it's saved back to the client record as well. See Sites and contacts.
Job addresses are geocoded automatically, so the job shows up on the schedule map view.
Step 2: Fill in the job details
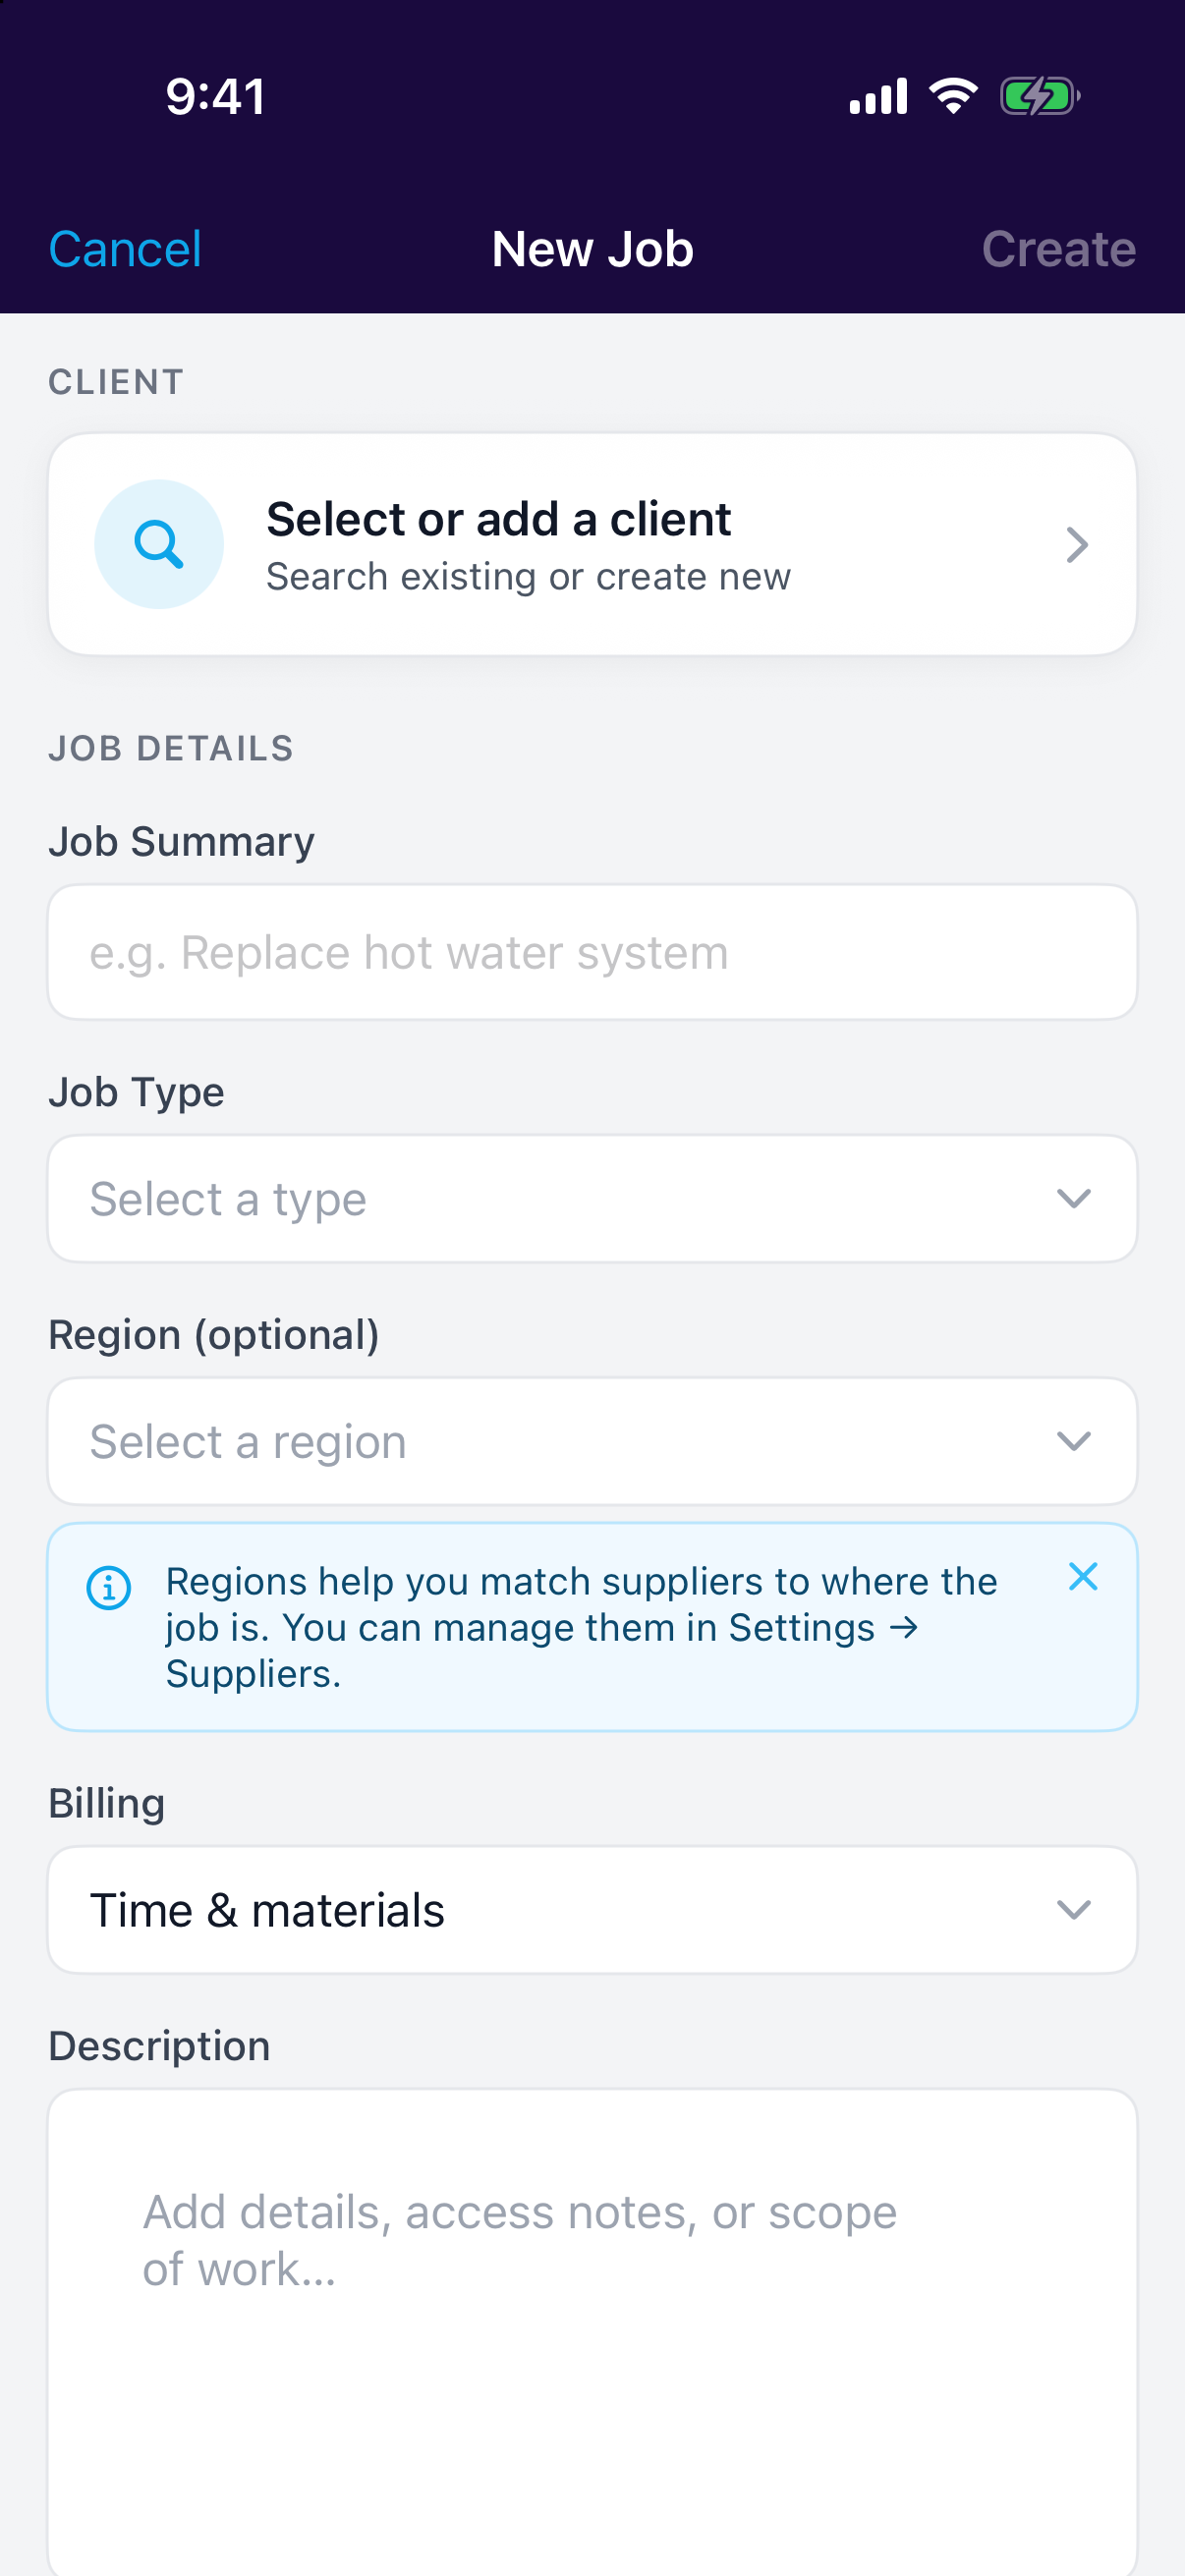
- Job summary: a short line describing the work, e.g. "Replace hot water system". This is what you'll see on lists and the schedule.
- Job type: your own categories (Maintenance, Installation, Warranty, whatever suits), defined in Settings → Jobs. Reports like Revenue by Service group on job type, so it's worth keeping the list tidy. See Job types.
- Billing: Fixed fee, Do & charge or Non-billable. This decides how the job gets invoiced and what it can carry, so it's the field worth getting right up front. See Job billing types.
- Region (optional): used to match suppliers to where the job is, for work orders.
- Description: the detail: scope of work, access notes, gate codes, what the client said on the phone.
- Team: who's working on it. If you're a solo operator this is hidden and the job is assigned to you.
From the dashboard use Create Job, or open the Jobs tab and start a new one.
Tap Create Job from the dashboard, or open the Jobs tab and add one. The flow matches the web (same client search, same quick-add, same fields), so you can start a job while you're standing in the driveway.
What happens when you create it
The job gets its next job number automatically, using the prefix and numbering you set in Settings → Jobs, and it starts on your default job status, normally "Not Started". Move it along the statuses as the work progresses, and it'll shift on the dashboard board with it.
Nothing is locked in
Job type, billing type, region, team and status can all be changed later from the job. Create it now, tidy it up as the job takes shape.
What attaches to a job
Once the job exists, everything else lives under it: quotes, appointments, timesheets, tasks, forms, photos and documents, invoices and work orders. One job, one full picture of the work.