Branding controls how your quotes, invoices, work orders and forms look to clients. Your business details — name, address, ABN, ACN and website — come from Settings → Company and appear on every document automatically. Set it up once and every document you send from then on carries your logo, your colours and your footer.
It takes about five minutes, and it's the difference between a document that looks like software output and one that looks like it came from your business.
Brand colours
Two colours drive every document:
- Primary: headings, the header band and accents. Use your main brand colour.
- Secondary (optional): totals, links and the "pay now" call to action. Use something that stands out against the primary.
Pick a colour from the swatch or type a hex code straight in (for example #1A0A3E). If you don't set a secondary colour, Teamsmith uses a sensible default.
Where to find your hex codes
If someone designed your logo, ask them for the hex codes; it takes them ten seconds. Otherwise, open your logo in any image editor and use the eyedropper on the strongest colour.
Header logo
Upload the logo that sits at the top of every document. JPG, PNG or WebP, up to 5MB.
A PNG with a transparent background looks best; a logo on a white box will show its edges against a coloured header. Landscape logos generally sit better than tall ones.
Then choose a header layout:
- Logo Top: logo and business name span the full width. Best for wide or wordmark-style logos.
- Logo Left: logo on the left, your address details on the right.
- Logo Right: address on the left, logo on the right.
Footer image
The footer image is the strip at the bottom of the page. Most tradies use it for licence and accreditation badges (electrical licence, master plumber, manufacturer certifications) or association logos.
It has its own three layouts: Image Top (centred above the footer text), Image Left and Image Right.
Leave it empty if you don't need one; the footer simply collapses.
Footer text
The rich-text footer appears at the bottom of quotes, invoices, reports and forms. Common uses:
- Payment terms ("Payment due within 14 days")
- Bank details for direct deposit
- Licence and ABN numbers
- A short thank-you line
Keep it short
The footer is a thin strip at the bottom of every page, so it suits a line or two. Full terms and conditions have their own home on quotes; see Quote Terms & Conditions.
Preview and save
Go to Settings → Branding. The Preview button (top right) opens a full sample document with your colours, logos and footer applied, so you can check the result before anything goes out to a client.
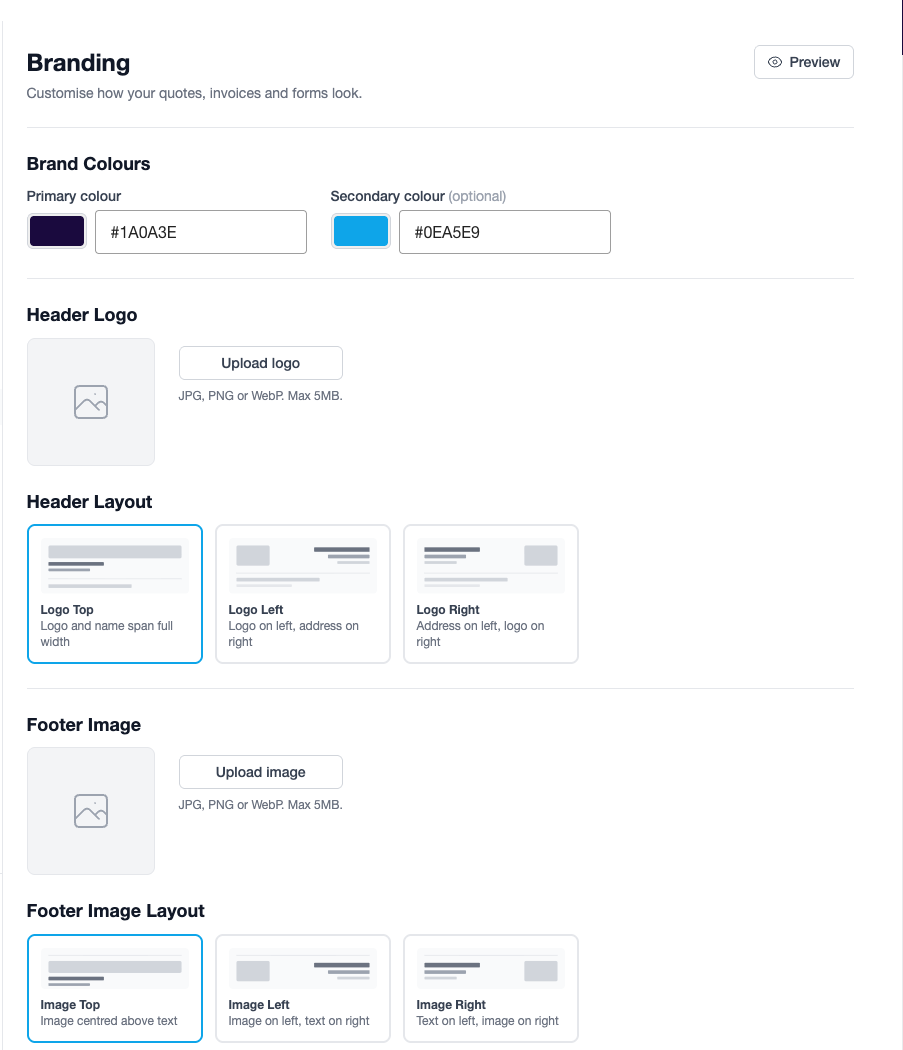
Click Save Changes when you're happy. New quotes and invoices pick up the change immediately.
Tap your avatar, then Settings → Branding. A live quote preview sits at the top of the screen and updates as you edit, so you can see each change land straight away.
Tap a colour row to open the iOS colour picker (with grid, sliders, hex entry and the eyedropper). Logos come from your photo library, so a logo you've been emailed or saved on your phone works fine.
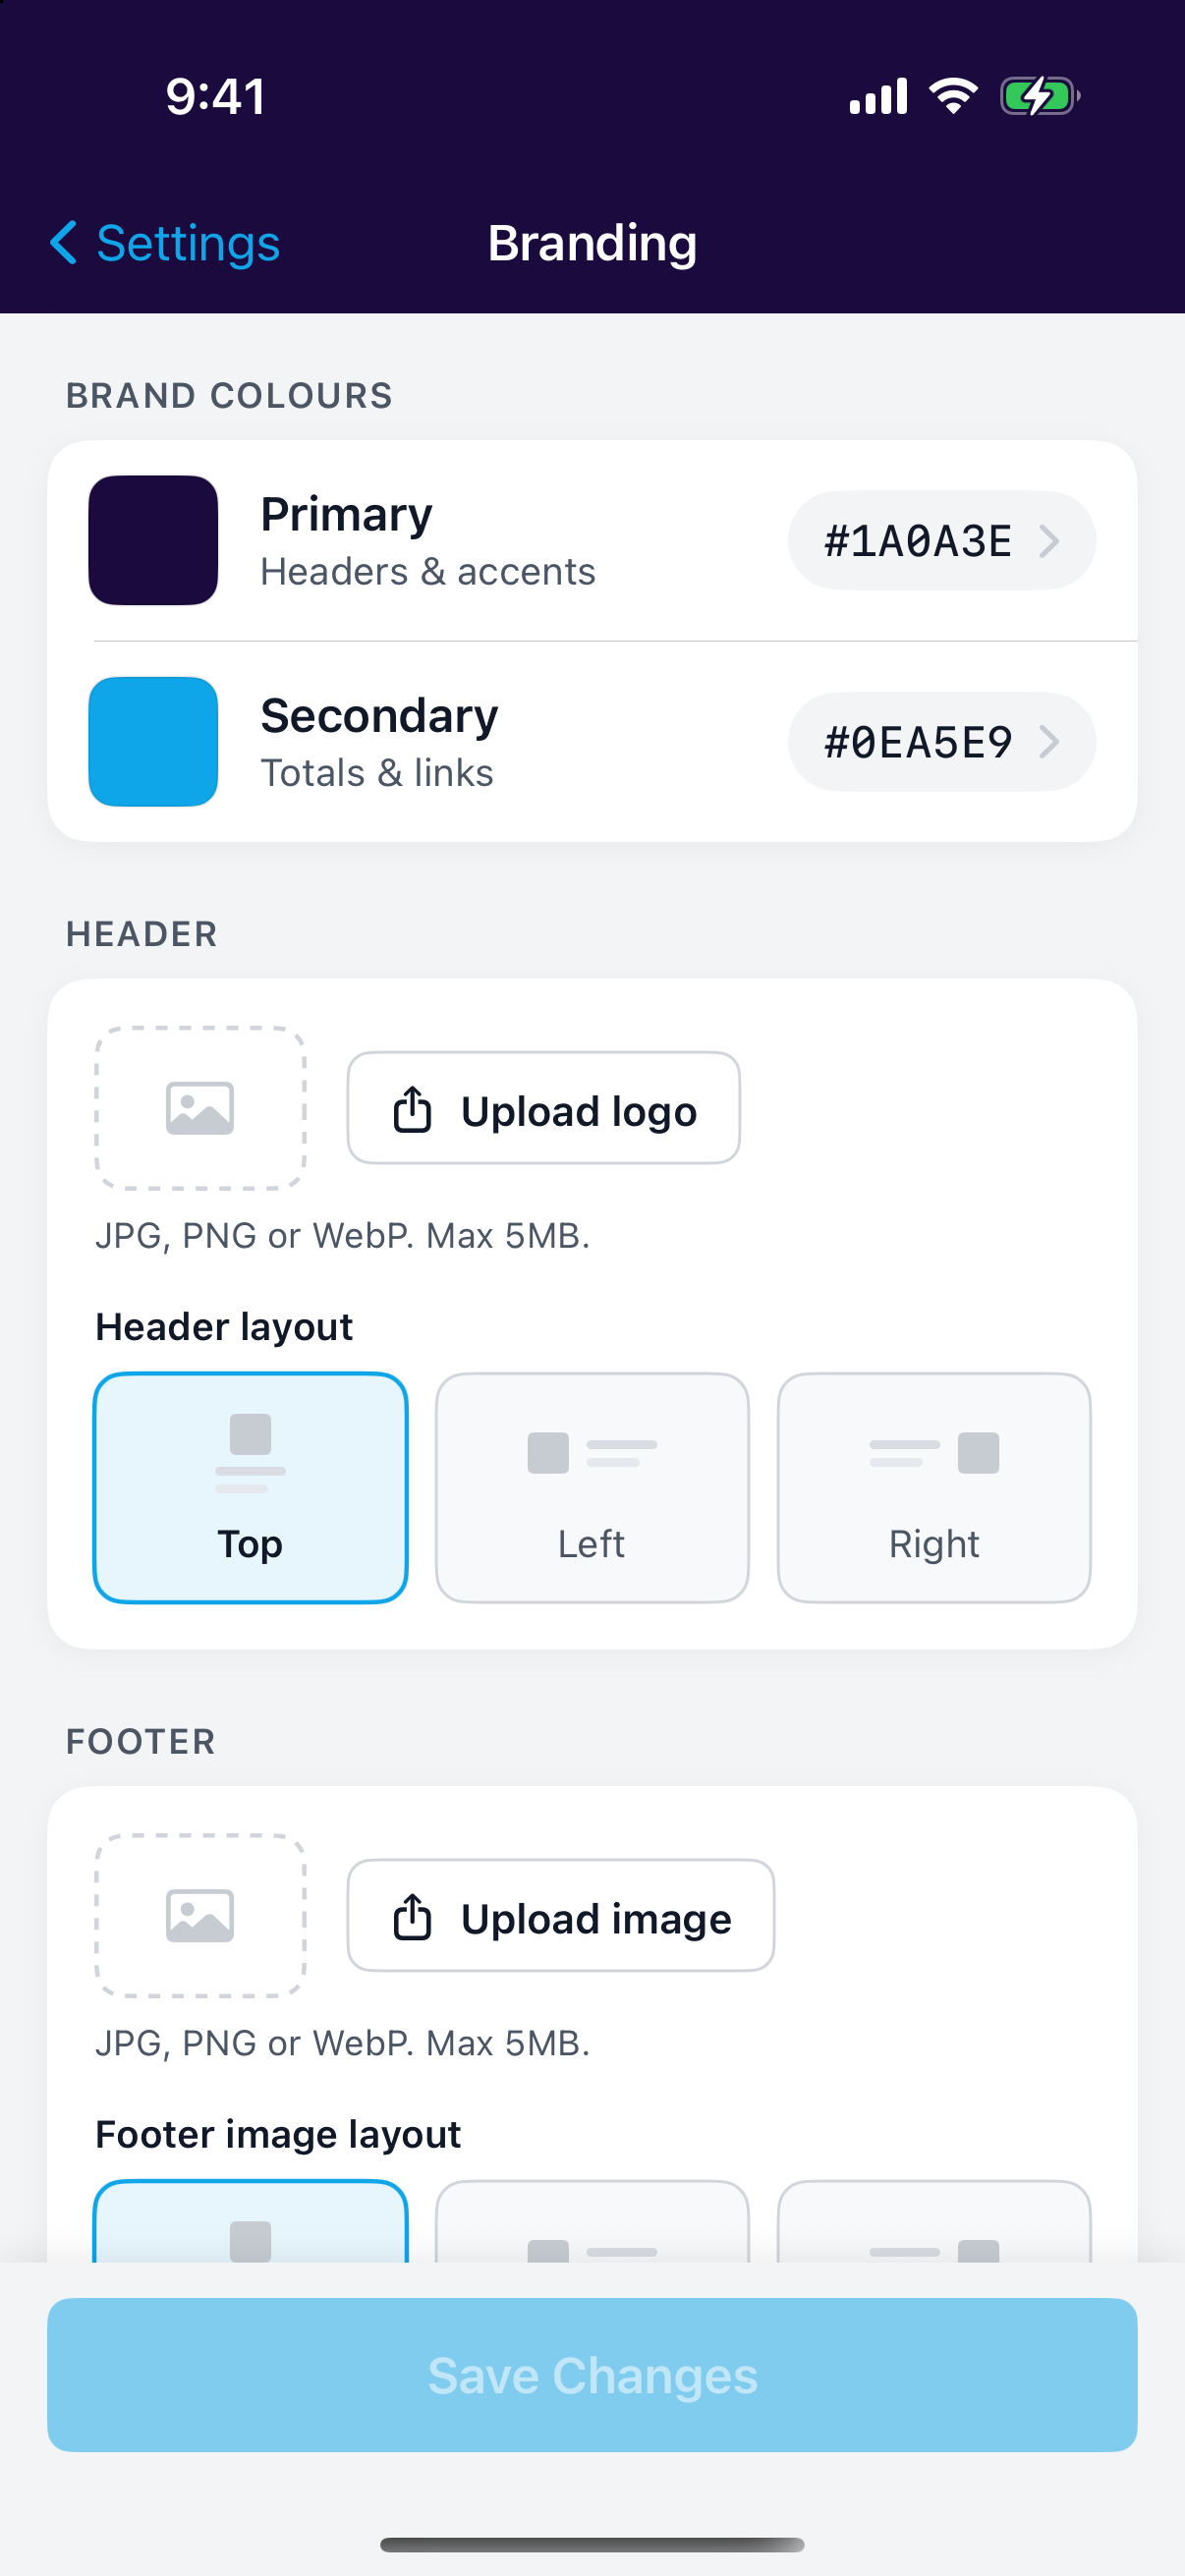
Tap Save Changes to apply. Company name and address are shown in the preview but edited on the Company Details screen.
Send yourself one
After saving, email a test quote to yourself and open it on your phone. That's how most clients will see it, and it's the quickest way to spot a logo that's too small or a colour that's hard to read.